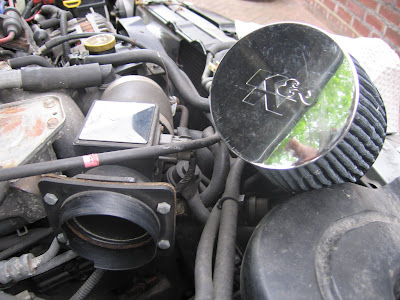
<-CLICK HERE FOR SCOOBY TECH. POSTS ONLY! CLICK HERE FOR GRAN TURISMO POSTS ONLY!->
1998 Impreza Turbo Project Car + Expanding WRX Knowledge Base!
Showing posts with label SERVICING. Show all posts

Saturday, 11 June 2011

Sub/Lower Front Suspension + Engine Mount Diagram

Diagram provided on request of the front suspension/steering sub-assembly, showing the main gearbox-mount [3], anti-roll bar [14] and drop-links [24], as well as the trailing-arm and its bush-mount [7+9], which I believe are at fault.

[click for bigger]

Saturday, 15 January 2011

Replacing the PAS-Pump

I wouldn't say this was a very advanced job, but it does get fiddly working in the confined spaces so the instructions are quite detailed. Also be prepared to contort your arms into horrible positions and make sure you have a socket-set with at least 5 inches of extra reach AS WELL as a 12mm and 14mm open-ended spanner, with as low a profile as possible.

PROCESS:

1. Slide the finger-clip down the rubber-hose that enters the top of the PAS-pump. Slide the hose off the metal-pipe on the pump and plug the end of the hose.

2. Remove the two bolts holding the pulley-cover in place using a 10mm wrench, then loosen the bolt on the right-side alternator bracket using a 12mm wrench a couple of turns so the pulley-cover can be slid out. Turn the pulley-cover over and push the plastic-stud that holds the throttle-cable clip out of its hole.

3. Using a 12mm open-ended spanner, loosen the far nut on the throttle-cable where it sits in the bracket as far as it will go so the cable can be pushed back and lifted out of the bracket. Swivel the cable so it clears the PAS-pump area and fasten it with a cable-tie.

4. Using a 14mm open-ended spanner, loosen the union-bolt that attaches the metal-pipe to the port on the left side of the PAS-pump. Only crack the bolt off a couple of turns so no fluid spills, but the bolt can be removed easily once the pump is no longer fixed in position.


5. Remove the bolt that is threaded through the long adjusting-bolt that moves the alternator up and down. There is no need to slacken the adjusting-bolt - once the holding-bolt is out, the alternator should drop down fully anyway.

6. Lower the alternator until the belt becomes loose enough to be slid off the pulleys.

7. Remove the 3 bolts holding the PAS-pump in place using a 12mm wrench. There are 2 bolts to the front of the pump, beneath the pulley, which are easy to find, but there isn't a lot of room to turn them. The third, to the rear-right of the pump can be accessed from above, but you'll need at least 5" of reach on your ratchet.

8. Now the PAS-pump is free, remove the union-bolt from the pipe on the left side and lift the pump out. It's best to wrap a cloth around the union-bolt when removing the pump to catch any PAS-fluid dropping into the engine, although the pump shouldn't spill a lot anyway. **Plug the end of the metal-pipe.

9. Install the new PAS-pump, replace the pipe/union-bolt and insert the 3 bolts holding it in place.


10. Slide the new belt into position on the 3 pulleys. Lift the alternator until the belt is tense and replace the bolt that holds the adjusting-bolt in place. Now tighten the adjusting belt to the torque mentioned in the Workshop Manual [here] or just until the top stretch of the belt can be moved about 5mm up or down.

11. Replace the rubber return-hose and finger-clip to the top of the PAS-pump.

12. Snip off the cable-tie, swivel the throttle-cable back into its natural position in the bracket and retighten the 12mm nut on the far side.

13. Add PAS-fluid to the pump and allow it drain into the system and air to come out until the fluid reaches the measuring-scale on the cap.

Monday, 3 January 2011

New Halogen Spotlamp Bulb - wrong type.

Well, happy new year everyone and as I'm so desperate to get back working on the car I've kicked off 2001 by buying another high-power halogen bulb to make my old O/S spotlamp match the one I bought recently. Problem is I made a hasty choice and bought the wrong kind. Even after describing the multi-coloured type to the guy in Halfords and re-checking the colour of the bulb itself it still turned out to just be a white glow, with a little bit of blue in the middle and looks more like the one it replaced. £8.99 in the gutter. Ah well, I guess I'll have to keep looking, or just change the coloured one for the original white one I took out today.


FITTING:

Changing the fog/spotlamp bulbs only takes a minute, but its more fiddly than I expected so heres the process.

1. Remove the 3 bolts holding the spotlamp in place using a 10mm wrench.

2. Unclip the plug on the spotlamp wire and slide it free of the wiring-harness in the bumper.

3. Turn the grey seal-plug anti-clockwise until it can be lifted out of the seal. Be careful not to pull too hard on the wiring.

4. Slide the earth-wire, with the light-blue rubber-sheath, up off its mount on the spotlamp chassis.

5. Slide the end of the live wire, coming off the base of the bulb, out of its socket in the seal-plug. The socket sits in a mount and can be lifted out to make it easier.

6. Push down the metal-wire clip behind the bulb at the side nearest the gray-plastic adjustment-bracket and move the wire-clip out of its mount and rotate it out of the way.

7. Replace the bulb with the new one and reverse the process.

Saturday, 18 December 2010

Quick Bumper Fix

I must have got a bit over zealous on the way to work on Thursday morning [racing Big Alex in his Isuzu Trooper 3L], because my back-bumper started to make its way off the car, luckily just as we were pulling up at the gate. The small bolt that holds the corner of the bumper by the wheel-arch has broken free of its rusting mount, leaving the right-side edge hanging loose and letting the bumper become wayward. The plastic-mount on the bumper has obviously always had a break in it, probably after that wheel-arch's scuff with a gatepost, but it was still clinging on. Once the bolt had made its way out of the body though the bumper didn't put up much resistance and the bolt is long gone. All this means there's no meat left to get a cable-tie round so I had to just drive carefully and pray the bumper didn't drop completely before the fix.

Everyone suggested just banging a self-tapping screw through into the metal, but that'd be too easy and no good if I need to take the bumper off in future. Instead I rustled around in the ever fruitful skip for a few minutes and found a nice allen-head bolt, two shiny washers and a brand new nyloc-nut. Outstanding. There's another small hole in the bumper just behind the split one, so I marked where it meets the body-lip and drilled a 5mm hole through the metal. Even with the car tilted on the curb I could barely get my hand into the gap between the tyre and wheel-arch, so I could barely hold the allen-key steady while I got the nut on. In the end I just managed to get the nut a few turns into the nylon, but enough to keep the bumper on until today when [with no help from the weather!] I got the wheel off and tightened it up.


>>> Oh and yeah, I do notice that the rust has creeped out from under the wheel-arch. There's a bit of bubbling too so both arch-lips are going to need rubbing-down and spraying again as soon as the weather turns reasonable, just hope it doesn't get much worse in the meantime. The moral of the story here kids is ALWAYS lacquer as soon as possible after spraying and wax-oil/seal the underside if its somewhere like the wheel-arch! Nightmare.


Saturday, 6 November 2010

Return of the MAF!! - Sensor Replaced!

It's less than a week since the car died and I've managed to get her up and running again, thanks mainly to a lot of help from the ScoobyNet massive. I really thought it was curtains this time - the car just seemed so poorly on Tuesday, coughing, spluttering and idling so crazily - all the signs of a generally broken engine and I would have never have known where to start diagnosing it without all the help and advice from the forum and its free - diagnostics are renowned for running up huge bills at garages, so the Scooby community really is worth its weight in gold.

With the mechanics at work all pointing to a broken head-gasket, I nearly started the horrible job of ripping the engine apart, but now I've discovered the black-socket trick for reading your own fault-codes, [which I will have to cover properly in its own post soon - I've never seen anything so trick!] I know I won't be needing dodgy opinions in the future. Much better to get info from people who know their Scoobys inside out!

By Friday I'd got in touch with a lad on eBay called BigEd4244 who had a couple of Purple MAFs for sale, and asked me to make him a serious offer. I said £70 and he messaged back to say he'd take £90 and send the unit next-day delivery, so I agreed and sure enough the MAF was waiting for me when I got home on Saturday. Fantastic, helpful service! A new one of these would set me back £289, so mine would have been literally cheap at twice the price.


Fitting it couldn't be easier. It's held in place by one of the bolts that hold the top-hat adaptor for the air-filter, which is fine if you have a cone like me, but getting the bulky, standard air-box off is a bit more involved, so check page 2-7 [W1A1] in the Subaru Workshop manual [download here] if you do have the latter. This process is the same for all Classics after MY97.

PROCESS:

1. Disconnect the battery earth-terminal.

2. Unplug the wiring-socket from the near-side of the MAF-unit by depressing the clip and sliding it out.

3. Remove the air-filter by undoing the jubilee-clip with a screwdriver.

4. Remove the four bolts holding the top-hat adaptor for the filter onto the MAF-unit using a 10mm wrench.

5. Undo the jubilee-clip holding the MAF-unit to the turbo-inlet hose and gently lever the MAF-unit down into the gap below until it breaks free of the rubber-hose.

6. Wipe around the mouth of the rubber-hose and the terminals on the MAF wiring-socket and reverse the previous 5 steps to install the new MAF-unit.

I am now reveling in smooth-running bliss. The engine feels so content through the rev-range now that I can't help wondering if the MAF-sensor has been on its way out for a while, becoming more and more noticeable with the cooler weather. I'm well annoyed that this £90 couldn't have been spent on improving the car elsewhere, but I guess keeping it on the road comes first. Cars eh?

Wednesday, 3 November 2010

MAF Sensor Trouble, Car Dead!

Oh my days, I've had so little to do on the Scoob lately that I have almost willed something to go horribly wrong. And it has. The MAF [Mass Air-Flow] sensor, which sits just behind the air-filter and gauges the amount of air coming in to the engine so it can prepare the right amount of fuel, looks like its thrown its hand in suddenly and for no good reason. Its a notoriously hard to come by part too and the worst bit is my baby is off the road until its fixed. Oh well, I was hoping when I did get working on the car it would be to upgrade it, but hey ho :)

FAULT FINDING:
The car started juddering on Monday morning at about 2500 revs so I let it warm up and it was fine so I put it down to the cold weather, but the judder has continued to get worse. When the turbo was kicking in the engine was going to pieces. Once the car was warm though and I managed to get past the rev barrier, the turbo was running fine.

I asked around on ScoobyNet and everyone suggested the MAF sensor, but to know for sure I'd need to plug-in and read the fault-code. I don't have a diagnostics-setup to hand myself, but I was amazed to find that Subaru have a built-in workaround for the layman. Under the steering-column, behind the dash, are a couple of black wire-connectors. When they're plugged together and the ignition is turned on the Check Engine light will flash a sequence like morse code. The series of long and short flashes corresponds to an error-code - a seriously cool bit of gadgetry that! I got 2 long and 3 short flashes, which is a code 23 and, of course, the MAF-unit. http://www.scoobypedia.co.uk/index.p...odeDefinitions

At the time that sounded great because I was fearing a blown head-gasket again, but its turning out to be a right bugger to get hold of. There are quite a few types of MAF-unit for the varied Imprezas and you have to get the right one. Each model variant has a corresponding coloured label on the MAF and most people were telling me to buy an Orange one so I had to get mine off to see.


Lucky I checked as it turned to be a purple one! I'd found someone with an Orange one to sell me for £70, but it looks like the Purple is a more elusive chap. ImportCarParts do have a few brand new Subaru's own Purple label MAFs in stock, but you pay for the convenience at £289!!

I've made my plight known on ScoobyNet and it seems the purple MAFs are popping up often enough so we'll have to wait and see what comes up because I just can't afford to shell out another 3 ton on repairs this close to Xmas.

*UPDATE!* 6/11/10 - I have obtained a purple-label MAF unit and it seems to have done the trick thank heavens! Info + How-To is in this post - MAF Sensor Fixed! Phew!

Sunday, 31 October 2010

Tyre Puncture Repair

A couple of months ago my dad spotted a screw in my n/s front tyre [why is it dads are so gifted at spotting stuff like that?! I bet he put it there!], but the tyre hadn't lost air so I soldiered on. Several weeks ago I checked the pressure again and it was down to about 15psi so I re-inflated it to 30psi and checked again a week later. The pressure had only dropped a few psi over the week, but I decided to act on it this weekend, rather than just keep on pumping it up.

A mate of mine recently had a tyre on his Vectra repaired for just £5 at a small tyre-centre in Wallasey, near where I work. I doubt I'd find time on my lunch break to get it done and its a 7 mile drive for me otherwise, so I decided to head to good old National where I bought the tyres as its only round the corner, although I didn't realise I'd end up paying nearly 4 times as much.

National did a repair on my dad's A4 estate not 2 years ago for a tenner, but today it set me back a cool £17.50 - Ouch! At least the tyre is fixed and to be fair to National they have 3 branches within 3 miles of where I live and the last few times I've been the service has been very quick - I had my Scooby keys back today in 10 minutes flat, so I guess you get what you pay for. http://www.national.co.uk

Sunday, 26 September 2010

New Koyo Alloy Radiator

FAULT FINDING:
I check the coolant level reasonably regularly, but one night the temperature-gauge went upslightly over the norm and after a while kept on rising so I banged the heaters on full blast and managed to limp the car about 2 miles home. Next day I discovered that the coolant had nigh-on disappeared! I filled the system back up with water - it took about 5 litres - to check for system failure and ran the car fortheweek,butthewater level stayed up and no sign of a leak. With no obvious evidence of failure my dad immediately suggested the head-gasket was blown and the coolant must have slowly gone through into the cylinders :( The mechanics at work backed up his claim and said that, because of the boxer-engine with a cylinder-head down either side, it was a nightmare job that needed the lump lifting out to do. I reckon I could do it without lifting the engine, but it would involve removing almost every other item from the engine bay. Rather that though than forking out for a professional to do it - I shudder to think how much that would cost. This could have been a killer blow for the Scoob, but all the other symptoms of a blown head weren't there - no oil in the water, mayonnaise in the oil, loss of power or rough-running.

At this point, with the levels staying up in the header-tank, I had to add coolant to the system to stop it rusting up, so I drained the water out, flushed it out with more water to get rid of any floating crud and re-filled it with a half and half mix of water and 3L of Halford's Advanced engine-coolant, which wasn't cheap at £24 (£7.99 per litre). I then checked the header-tank daily for a week with no change in the level.

Another two weeks of harder driving went by and I checked the coolant again. This time there was a definite drop in the level - the tank was only about a quarter full so I'd definitely hit a problem. Now I spotted the radiator. Its always looked battered but showed no signs of being split - I guess the old leaking coolant couldn't be seen as well as the fresh bright-pink stuff. By the look of the pink patches though, the radiator had burst in three places so it had to be replaced asap and I didn't know whether to be gutted over this or elated that it wasn't the head gasket...

NEW RADIATOR:
I had intended to put an all-alloy racing radiator on at some point, but these cost £130-£300 so to fit one now would kill my chances of buying brakes and stuff any time soon and I've got to move forward with the car. The OEM-spec radiators are all-alloy themselves [although not as chunky obviously and in a mild-steel surround] and less than half the price so it was a no brainer really to get the leak fixed. I scored one for £50 including next-day delivery off a guy called [dilley3613] on eBay - laughing. It's no cheap Chinese piece either, this is made by Koyo in Japan and, although its not quite as sturdy as the original one, its still looks a decent-quality part.

Fitting it was not a hard job at all. You only need a couple of spanners and there's not a lot to undo. There's plenty of space to work in a
nd the radiator lifts out clearly. Our only setback was the two bolts holding the radiator top-mounts were rusted so tight they snapped on the way out so we had to drill through and put a new bolt in with a nut underneath, which took ages. The top-mounts are all that hold the radiator on so check them for rust and WD40 them for about a week in advance to try and avoid the hassle.

PROCESS:

REMOVAL:
1. Jack the car up and remove the front under-tray by the two 10mm bolts on either side and the two 12mm bolts front and back. Lower the car.

2. Remove the radiat
or/header-tank cap to release pressure from the cooling-system.

3. Drain the cooling-system by placing a plastic-tube over the spout of the drain-valve at the bottom left of the back of the radiator and opening the valve. Drain into a clean bucket if you're re-using the coolant as I did and cover it straight afterwards.

4. Disconnect the fan wiring-socket by sliding a screwdriver down the slot in the connector until the two sides can be pulled apart.

5. On MY97/98 model cars the overflow-pipe from the header-tank is a thin metal tube that runs along th
e top of the radiator - later models won't have this. Disconnect
the overflow pipe from the system by removing the finger-clips and sliding off the rubber-hoses at each end.

6. Disconnect the rubber-hose from the overflow pipe at the top-left of the r
adiator by removing the finger-clip and sliding it off.

7. Disconnect the two large hoses from the top-left and bottom-right of the radiator by opening up the jubilee-clips with a flat-screwdriver. They will be sealed on tight, but should wiggle off easily once the seal is broken by pushing against the edge gently with a screwdriv
er. [It's worth putting a tray underneath the lower hose when you disconnect it as there will be a bit of coolant still pooled down there.]

8. Remove the two 12mm bolts holding the radiator top-mounts in place and tilt them up out of the bushes on the radiator.

9. Now the radiator can be tilted back, remove the single 10mm nut holding the PAS-fluid cooler in place. This is the two pipes that run over the radiator and
down the front. There is no need to disconnect the hoses from the PAS-coole
r as it can be tilted well clear for the radiator to be lifted out.

10. Slowly lift out the radiator, working the lower-bushes clear of their mounts.

11. Separate the fan and overflow-pipe from the old radiator by removing the two 10mm bolts at the bottom of the fan and the three 10mm bolts along the pipe at the top of the radiator. Also remove the top and bottom rubber-bushes to be reused.

REFITTING:
12. Bolt the fan and overflow-pipe to the new radiator using a 10mm wrench and re-insert the top two rubber-bushes.

13. Replace the bottom bushes to their mounts on the chassis. [The pins on the radiator are easier to use as a guide than putting the soft bushes on first and having to force them in.]

14. Lower the new radiator into the engine-bay, pushing the guide-pins firmly into the bushes.

15. Bolt the PAS-fluid cooler back into place, with the pipes over the radiator, using a 10mm wrench.

16. Push the pin on each top-mount back down into the bushes on the top of the radiator and replace the two 12mm bolts.

17. Push the two large rubber-hoses onto the new radiator [a tiny bit of washing-up liquid might help] and tightly secure them with the jubilee clips.

18. Push the rubber-hoses back onto the overflow at the top-left of the radiator and either end of the header-tank overflow-pipe. Replace the finger-clips.

19. Refill the system with 6.5 litres of a half water/half coolant mixture using the spout next to the battery or the header-tank and letting it run through.

20. Replace the header-tank cap and the front under-tray. You're done!

Saturday, 10 July 2010

Snapped My Only Key!

I bent the key a bit too hard while pulling it out of the ignition and snapped the tip off it. It was bent already and waiting for an opportunity to go and my heart sank as the tip snapped off inside the ignition, the worst possible place. The gods must have been listening to me right then though, because the metal dust-flap clicked shut a moment later and ejected the key-tip like a CD - fucking lucky!!

It turns out the keys are coded [with a little chip inside the plastic that sends a signal to the immobilizer] so I couldn't just have a blank one made up that Saturday afternoon. Instead I had to leave the car stationary and unlocked until Monday when SafeSmart in Birkenhead opened again.

It cost £30 to have the key made up, but if I had a spare in the first place I wouldn't have had any trouble so I decided to future-proof myself by having a second one done to boot. Still not bad @ £60 [i'd have paid double that to get up and running again] and I have a spare - great, as I ran my BMW for 3 years with only one key and worried my arse off.

Sunday, 20 June 2010

MOT Pass!!

By the time I got back to Seaview motors it was a couple of days too late to get the re-test for free, so I had to fork out another £40 quid, but he very kindly agreed to only do the partial test and check only what the car had failed on anyway. The current MOT still didn't expire for another 6 days, but it turns out I don't lose any of it as this latest certificate is valid from the day of the test, but runs until a year from the current end date [16th June 10 - 22nd June 11] - very nice.

First up was the emissions, with the car recording less than half the original CO2 figures just from the addition of a sports-cat, [although I'm sure the oil/filter change played it's part too]. The guy also reckoned the exhaust had dropped in volume sufficiently, so that was £235 well spent and this cat doesn't kill power so it can stay on.

We got the Scoob up on the ramps and I talked him through the mechanical work, then I jumped in and we did a quick check off all the lights, all things A ok. He did mention that the headlight beam had been lifted just enough, although both were still out of line and should be checked in future, but he didn't even prescribe any advisory notices, so excellent.

If I'd bought the standard shocks instead of the TEIN coilover setup then I would have got the car through for about £400 [or even <£300 if I found a used OEM exhaust]. As it stands I've spent about £900, but hey ho, progress is progress! The standard £115 shocks would have got me through the test, but compressing the old springs back on would have been more involved and the front shocks might need doing soon anyway. I also planned to lower the car at a later date, so thats out of the way too. Besides, doing all the work myself has saved me one hell of a packet and I have the great feeling that no ruthless mechanic has rattled the parts on :)

The true positive outcome of this MOT is that the car is rid of those dodgy discrepancies. It's obviously been pushed through some bent MOTs in the past, with no fog-lights or catalytic-converter, so it's good to know I've brought the car back into check for next year, or the next owner. Time to get back to the bodywork and buy a new front spotlight!


Tuesday, 8 June 2010

Steering-Rack Boot Replacement

The O/S steering-rack gaiter, which is a rubber boot that holds grease around the rack, was leaking and this was an MOT failure so before turning to any Subaru garages I shopped around online and got a pair of the boots for £12 from PartsFromJapan.co.uk, who have an amazing selection of the smaller, rarer parts and, with a little help, managed to get the O/S one on in under an hour.

PROCEDURE:

1. Jack the car and get the front wheel off, on the side you're doing the boot on obviously.

2. Take off the front under-tray by removing the two 12mm bolts on the centre cross-member, two 12mm bolts beneath the front lip and the two 10mm screws at the sides.

3. Linked to the hub, just behind the front-edge of the brake-disc is the track-rod end, which runs up into the steering-rack. You can see the rubber-boot over the far end of the track-rod, covering its join to the rack-body. [Mine was split totally in half as you can see below and had seeped grease everywhere.]


4. Using a 17mm open-ended spanner undo the locking-nut holding the track-rod to the hinged mount on the hub. The nut is facing the hub not the rack so if you're facing the brake disc it un-tightens clockwise. The track-rod will likely rotate and move up and down on its bushes so hold further down the rod with strong-grips [or a funny sized spanner if you have one, we got one to fit but its not metric and doesn't have a size printed. I also ended up bracing this against the thick hub-frame to get enough turn on the big spanner to crack the nut.]
Once the locking-nut is turned only slightly, it should allow the track-rod itself to turn freely, anti-clockwise, out of the hub-mount.


5. Open the finger-clip holding the near end of the rubber-boot and slide it off the rod. Undo and dispose of the clip or tie holding the large end of the rubber-boot on to the rack body. Cut open the rubber-boot and slide it down off the track-rod. [Mine had been split, and the rack exposed, for quite some time so I cleaned off all the dirt and grease I could with a rag - thankfully no gravel has got into the steering!]

6. Re-grease the rack and smear a few blobs of grease around the inside of the new rubber-boot. [We used Castrol LM Grease we had lying around. I'm not sure what Subaru suggest, but any thick engine grease will do.]

7. Slide the new boot over the track-rod end, working the narrow part over the locking-nut, and up into position. Replace the clip/tie from the large boot end with a cable-tie, then slide the finger-clip back down the rod and re-fasten it. Screw the track-rod back into its mount and tighten the locking-nut hard anti-clockwise. Replace the wheel and front under-tray.

This is a relatively simple job, done in an hour with just a few spanners and would no doubt cost plenty at a garage, let alone one of the 'Subaru' ones!

Sunday, 6 June 2010

MOT Update - 2 weeks to go!

The test looms near and wow there's a lot going on in Scoob world! - I've spent over £1000!!

Got about a fortnight to go now until the current MOT runs out, however I'll have to get the car back into Seaview Motors by next Friday (11 June) to qualify for a partial re-test, where they only check what the car failed on [and any other faults that have arisen this week will be ignored!]

Just over a week and I've sorted all but the few mechanical problems.
Heres the checklist so far :

1. N/S Headlamp Aim - The 98 model Scoob features electronic headlamp-leveling [for when you're towing a caravan] so the beam for my O/S headlamp can be raised with the flick of a switch. The N/S one is off a 94 Scoob though, with no fancy leveling and simply had to be raised the old-school way by shining the lights onto our garage door and adjusting the beam up manually with the ratchet behind the light-lens.

2. Number Plate Lights - Luckily the 'broken' one only needed a new bulb, the socket was just hiding away in the bumper so I replaced both bulbs with 'Heavy-Duty' 12v-5w mini-bulbs @ £3.99 from Halfords. The other socket had worked its way free of its mount so I just screwed it back up with a 10mm long self-tapper. Simples.

3. Foglamp Not Working - This got fiddly! We took the bulb out, which looked blackened so we chucked in a replacement to find this wouldn't work either. After much deliberation over whether the switch or wiring may be broken we reached for the Multimeter... I first downloaded some wiring diagrams for the rear lights and as my dad and I got our heads around them we discovered that the two wires that run to the Subaru fog-lamp were not connected to anything on the new twin-clusters. I chopped the wires from the fog-lamp on the new clusters and fed them directly through the connector and into the two terminals that had previously been blank. Hey presto! Instant fog-lamp! Its a great feeling to know I've finally given the car a fog-lamp it never had before, but weird how she sailed through her last 2 MOTs with these lights on - no mention of the friggin non-existent lamp! Dodgy!

4. ABS Warning Light On - I downloaded a "Diagnosis Checklist" for the ABS warning light - a whole 50 pages by itself!! We grabbed the multi-meter and managed to work through the major components [PCM control-module, power circuit, etc.] with no results. I've deduced it is probably one of the tiny ABS-sensors on the wheels, which are nigh-on impossible to replace, so for now I decided to just take the bulb out of the warning-light in the dash. Had to take the whole dash apart to get the gauge-binnacle out, but all in all the job took less than an hour.

5. O/S Steering Rack Boot Split - Found the part on a great site called JapaneseMotorSpares.co.uk, who have a superb stock of all those niggly, hard-to-find import parts. A pair of the boots cost £12 delivered and arrived the next day, absolute bargain, so I will have to get around to fitting the other one seeing as I have a spare. We got the boot on very easily in about 1 hour - I'll cover it in a post soon as.

6. N/S Rear Shock Absorber Leaking - I went a bit mad here. A pair of OEM [Kayaba Racing] rear shocks was the obvious direct replacement and cheap as chips @ £115 - but I didn't buy those. Instead I plumped for an entire adjustable coilover kit from JDM badboys Tein, which was a bit pricey @ £655, but you get what you pay for - these are the real deal!! Me and dad fitted the rear two on Sunday, but its a complete kit so the front ones will have to go on soon. Watch out for the post!

7. Emissions and Noise Excessive - This was the real problem-child. Quik-Fit, National, even large local stores like Chester Exhausts don't exactly shift many of these standard systems, so the cheapest price quote I could get for a full system, fitted while I sip coffee was £819. Ouch. The next option was to buy the OEM system separately and fit it myself. All I could find new was a real budget model 1st and 2nd cat @ £240 together, but still a rear pipe would be extra.
Scoobynet chums suggested I just shell out for a sports-cat for about £250 and have done with it, which will pass the MOT while hardly decreasing the power or noise. This originally seemed expensive to me, but after the OEM shit I guess not only is it the best value-for-money, but actually the cheapest option too lol. I tracked down a nice Prodrive 100cpi sports-cat that should fit straight onto my Peco centre-section... I hope, and its a bit below the average @ £235 delivered, although it is a used item - off a V4 STi Prodrive to be exact :) Hopefully this will get us through the test - I will have to hope it kills the noise a little bit or I'll have to buy a bung...

The deadline is Friday and the Prodrive cat still hasn't arrived so fingers crossed!

Saturday, 29 May 2010

Pre-MOT : The Verdict.

The current MOT runs until the 22nd of June, but after being told by the dudes in National Tyres the other week that my rear-shocks were kaput, I decided to get the car in as soon as possible and find out what the damage really is.

The last MOT was done at Seaview Motors in Liscard, Wirral and as Village Motors in Wallasy [where I stupidly kept taking my BMW] are the most knit-picking test-centre in the world, I thought it couldnt hurt to give Seaview a try if they know the car.

The test cost £45 quid, which is a whole £20 more expensive than Village Motors, but if I'd taken the car there I then it would be for sale right now...

Here's a scan of the test-sheet itself. Im amazed it didn't fail on anything more serious!


What I'm most surprised at is that the brakes came home A-ok - the discs at the back are pretty worn! The bane of my life with the BMW was rubber-bushes all over the place - only pennies to buy, but an absolute bastard to fit. Subaru obviously know this then and fit superb ones to their chariots! [unless I was just right to trust Seaview garage to be lenient... ;)]

Ok so a few things on there, but it's not the end of the world. here are my intentions:

1. Headlamp - It's off a MY94 Scoob so it doesn't fit the grille right and this pushes it down to aim for the floor. I had to cut a slice out of the grille to fit it this far... so more will have to go if need be to tilt it up.

2. Number Plate Lights - Pennies to replace the bulb and a bit of glue to stick it back in place - done.

3. Rear Foglamp - Someone hasn't fitted the twin light clusters at the rear properly, leaving off the wires to the fog and reverse lights. Should be an easy fix when I find the wiring diagrams.

4. ABS Warning Light - This is a tricky one. There are 65 pages in my workshop-manual devoted to diagnosing problems with the ABS light. I'll be checking all the basic components with a circuit-tester and the mechs at work can run a diagnostic machine on her, but the tiny brake-sensors are very hard to replace, so if thats the case I might just cut the wire to the warning light.

5. Steering-Rack Gaiter - A rubber sleeve that holds grease round the steering-rack has split. £10-20 for a new one and its a doddle to fit, provided nothing has seized.

6. N/S Rear Shock - Was well chuffed when only one of the shocks failed after the National guys said both were wrecked - best to replace both though anyway! A replacement OEM pair [Kayaba Racing] is a snip @ £115 for the pair from camskill.co.uk. What I really want though is a full set of coil-overs for the car - and it has to be Japanese. I fancy a set of the TEIN Super Sport kits, usually costing a grand, which are going for £650 on eBay - I could just afford to take this giant leap so fingers crossed.

* 7. Emissions and Noise - The exhaust is the only bit that baffles me [no pun intended!]. I can fit a bung to make it quiet, but emissions is a different story. I'd suspected the CAT had been removed and wasn't surprised to hear it would need to be put back on for the MOT. I can slap on a brand new budget unit [down-pipe, CAT, front-pipe] for £120 from a great site called Cats-Direct so no worries there, but now the problems begin. Will the OEM front-pipe fit onto the 3" custom centre-section? It can be adapted to fit as long as its the right length to meet the join but, even with the CAT on, the custom straight-thru centre-pipe and back-box might still fail the emissions test.
So will I have to splash out on a full standard exhaust-system? Guaranteed pass and my fuel economy will certainly improve no end! The car would also be peppier at low revs and the engine idle more nicely and generally be more sedate. Lets not forget that I'll be dropping about 20bhp though! And what can I do with my beautiful 3" s/s turbo-back system? Bin it?

Decisions, decisions... I've been preparing to spend some money for the MOT for a while now so lets wait and see.


Sunday, 9 May 2010

Cleaning the Air Filter

I wouldn't say the engine was suffering too much, but the K&N filter has always looked a bit gunged up so I decided to whip it off and service it, just to tick one more little bit of maintenance off the list.

I unbolted the cone at the jubilee-clip and laid it sideways in a shallow bath of petrol, rotating it every 10 mins. until the entire filter was soaked and the petrol had turned a thick, murky black. I left the cone to dry out and finally stippled three caps of oil over the filter-spines with an old paintbrush. [K&N recommend their own special 'filter-oil' , but my guess is that any light-oil will do just fine, so we used a nice, thin 0-40W engine-oil, sue me.]


As you can see in the pic, the plastic mounting-plate for the cone has cracked all down the left side of the mouth and it took ages to find a suitable angle for the jubilee-clip to hold the cone on tight, but only just. The cold-air feed in the bottom-right of the pic turns away from the air-box and does a 180° turn inside the wing before coming back to the filter. This extra duct is pointless so I'm going to make it much more direct soon.

I'll have to see about replacing the cracked mounting plate, but while I'm at it I might do away with the cliched 57i cone and stick on something more fitting - a HKS Super Power Flow mushroom [http://www.hkseurope.com/intake/spf_reloaded.asp] if I can find a used one cheap enough on eBay, but if I'm spending over £100 just on an air- filter then I'm going BMC carbon-dynamic all the way [http://www.bmcairfilters.com/infoCDA.asp].

Wednesday, 5 May 2010

Power Steering Whine / Workshop Manuals

There has always been a whining noise from under the bonnet while turning the car at very low-speed, even though the steering feels fine. I first checked the power-steering fluid level, which was just under the maximum, so with no Hayne's manual available for the Impreza I tracked down some manuals on the internet from a great site called PDFTown. Links below:

MY97-98 Subaru Service Manual - http://pdftown.com/PDF-Subaru-Impreza-1997-1998-Service-Manual.html

I cant find a more detailed Subaru workshop manual for my MY98 car, but there is one for MY99-00 cars and most of the parts and fitting are still identical - http://pdftown.com/Subaru-Impreza-1999-2000-Workshop-Manual.html

All other Subaru manuals are here - http://pdftown.com/Pdf-eBook/Subaru.html

After a bit of research the most optimistic explanation I could find was that the V-belt, which drives the power-steering pump and the alternator, was loose. This is simple enough to tighten up by winding a tensioning-bolt, which I did to the recommended 8mm play in the belt, even though mine is a little cracked and worn. We also fed a little oil into the centre of the power-steering and alternator pulleys and turned the engine over for a while.

This has certainly improved the whine, but it can still be heard inside the car when maneuvering. It could be a failed bearing in either of the pulleys, or the power-steering pump or alternator itself so only time will tell. At least the steering is functioning flawlessly...

Monday, 1 March 2010

Subaru Specific Fault Codes

Here's a list of the fault-codes that correspond the 'Check Engine' flashes from the 'Black-Socket Trick'. The number of long flashes represent the first digit of the code and the short flashes are the second digit, i.e 2 long flashes and 3 short would be a code 23.

[If you have a plug-in module for reading OBDII fault-codes then you'll need this set of codes instead - generic Subaru OBDII trouble code definitions - from ScoobyPedia.]

1Engine Speed Signal Circuit
11Crankshaft Position Sensor
12Starter Signal
13Camshaft Position Sensor
14Fuel Injector No. 1 (Legacy, Impreza, Justy, SVX)
15Fuel Injector No. 2 (Legacy, Impreza, Justy, SVX)
16Fuel Injector No. 3 (Legacy, Impreza, Justy, SVX)
17Fuel Injector No. 4 (Legacy, Impreza, SVX)
18Fuel Injector No. 5 (SVX)
19Fuel Injector No. 6 (SVX)
21Engine Coolant Temperature Sensor
22Knock Sensor
23Mass Air Flow Sensor Circuit
24Idle Control System Malfunction
24ISC Valve (Stick)
24Open/Short in ISC Valve Circuit
26Intake Air Temperature Sensor
27ATF Temperature Sensor Circuit
28Knock Sensor #2
29Crankshaft Position Sensor 2
31Throttle Position Sensor Circuit
32A/F Sensor #1 System
32A/F Sensor #2 System
32Oxygen Sensor
33Vehicle Speed Sensor
35CPC System
36Turbine Speed Signal
37Rear O2 Sensor Circuit / A/F Sensor Circuit Malfunction
38Torque Control Signal #1
38Torque Control Signal #2
38Torque Control Signal System
38Torque Permission Signal
39Traction Control System
41Air/Fuel Adaptive Control
42Idle Switch
43Accelerator Pedal Switch
44Turbocharging Pressure Control Signal
45Pressure Sensor
46Neutral or Parking Switch or Circuit
47Fuel Injector
48Lean Burn System
49CO Resistor
51Neutral Position Switch
52Parking Brake Switch (Exc. Justy)
53Antenna
53Anti-Quick Operation Mode
53Communication Error (Time Over)
53EGI Control Module EEPROM
53IMM Circuit Failure (Except Antenna Circuit)
53IMM Control Module EEPROM
53Key Communication Failure
53Reference Code Incompatibility
53Use of Unregistered Key
54Air Intake System
55EGR Valve Lift Sensor
56EGR System
57Canister Control System
58Air Control System
61Air Suction Control Solenoid Valve
62Exhaust Manifold Valve Negative Pressure Control Solenoid
64Relief Valve Control Solenoid Valve 1
64Relief Valve Control Solenoid Valve 2
65Differential Pressure Sensor
66Twin Turbocharger System(H)
66Twin Turbocharger System(S)
66Twin Turbocharger System(T)
66Two Stage Twin Turbocharger System
67Exhaust Manifold Valve Positive Pressure Control Solenoid
68Turbocharging Pressure Control Output Signal #2
71Shift Solenoid Valve
72Shift Solenoid #2 Circuit
73Low Clutch Timing Solenoid Circuit
74Brake Clutch Timing Solenoid Circuit Malfunction
75Line Pressure Duty Solenoid Circuit
76Brake Clutch Pressure Duty Solenoid Circuit Malfunction
77Lock-Up Duty Solenoid Circuit
78Tiptronic Solenoid System
79Transfer Clutch Duty Solenoid Circuit
81Torque Up Control Valve
85Charger System Circuit Malfunction
86CAN (Communication System)
87Variable Induction Solenoid Valve Circuit Malfunction
88Fuel Pump Circuit Malfunction
89VVT Systems (L)
89VVT Systems ®
91TCS Relief Valve
92Electrical Generation Control Signal Circuit Malfunction
93Vehicle Speed Sensor #1 Circuit
94Lateral G Sensor Signal Circuit Malfunction
 
ScoobyLab + Propjam 2010/11