<-CLICK HERE FOR SCOOBY TECH. POSTS ONLY! CLICK HERE FOR GRAN TURISMO POSTS ONLY!->
1998 Impreza Turbo Project Car + Expanding WRX Knowledge Base!
Showing posts with label MISC.. Show all posts

Tuesday, 5 June 2012

Cad Scoobies at Tatton Hall Classic Car Show 2012

I've not heard of Cad [Cheshire and District] Scoobies before but they're a well organised club of Subaru enthusiasts that had one of the largest and best presented stands at the Tatton Hall Classics show. Ok so they're not exactly classics - those hawkeyes are a long way off - but they still seemed to be drawing a big crowd. Find out all about Cad Scoobies on their info page here - http://cadscoobies.com/about.html.

http://cadscoobies.com/


For the full story on Tatton Hall Classic Car show 2012 and over 120 pics go here: Tatton Hall Park Classic Car Show 2012 [on my other blog: http://retrorunabouts.blogspot.co.uk/]

Cars from Gran Turismo at Tatton Hall Classic Show


Went to Tatton Hall Classic Car show on Monday and saw a few cars from the game. Was funny to see cars like the Honda Beat and Toyota SERA in the flesh for the first time and the the matt-black GTR looked the nuts. For the full story on Tatton Hall Classic Car show 2012 and over 120 pics go here: Tatton Hall Park Classic Car Show 2012 [on my other blog: http://retrorunabouts.blogspot.co.uk/]


Nissan GTR 'Stealth Edition' haha.


Honda Beat.


Wednesday, 5 January 2011

Homemade Decals 1st Attempt - AUTOBACS

I got a load of vinyl off the lads who come in to sign-write our vans at work, so I've been planning, in true ScoobyLab styler, to have a go at making my own graphics and decals for the car - when I get round to it. Couldn't wait to make a test piece though, so I spent an hour of my bank-holiday bashing up this little Autobacs number...


Ok, so under a microscope you can see they're a bit rough around the edges, but for glancers they look the part. They weren't hard to make either. I got the logo and reversed the image horizontally. This way I can stick it onto the back of the vinyl so I can see what I'm cutting then, when the stickers are applied, the letters show up the right way round on the shiny side. As for the cutting I just used sharp scissors and a Stanley-knife.


Who are AUTOBACS? Well, they're basically just the Japanese Halford's. The Japs are crazy over their cars though, so they revere these stores like gods and proudly show off Autobacs decals, so I thought it'd be a good talking point for discerning modders, although anyone who's switched on enough to mention it would probably ask why I'd made my own stickers.

Check out the awesome AUTOBACS site - http://www.autobacs.com/world/

Here's a great vid from an ancient Top Gear with [a young and funny] Clarkson browsing round the Autobacs flagship store in Tokyo.

Sunday, 28 November 2010

Wing-Mirror Fixed!!

The wing-mirror had obviously been knocked off at some point in the past and it was held on a by a massive wrap of strong tape that looked ghastly. I recently decided to replace that with nicer looking black-tape, but it just wasn't up to the job. Rather than chuck loads more tape on I decided it was time to just bite the bullet and fix it as I can't lacquer the car this weekend.


The metal mount has sheared clean off, but there's no damage at all to the wing-mirror casing and the electric swivel still works so it seemed a bit of a waste to buy a whole new unit [starting at about £30 on eBay for a used one] when there's probably a way to fix it. The metal mount is only alloy so I figured it wouldn't be hard to drill a hole in both parts and get a bolt through. There's plenty room in the casing to hide the bolt and for a real tidy touch I drilled through one of the existing screw-holes on the door-mount so the bolt-head is also hidden away, which also made drilling a lot easier. The screws only hold the plastic-casing onto the mount and there are 3, so I think I can afford to lose one.


Hiding the bolt-head means the work I've done is invisible, but I had to use a 4mm bolt to fit the head up into the existing screw-hole. Even a slim steel bolt won't snap easily, but I would have liked to use a fatter one just to reinforce against those wheelie-bin knocks as it can't swivel inwards, but it couldn't with the black-tape anyway so I'll have to carry on being careful. I was beginning to think the job was suspiciously easy when I hit my first snag - tightening the bolt without the nut spinning around. To do this I had to remove the mirror-glass and motor-bezel to make a small gap to slide a spanner through and grip the nut. The plastic around the nut was still very constricting and the spanner had to be poised perfectly on the edges of the nut to get a few turns before it gave and had to be repositioned, which was frustrating but I got there in the end so money well saved.


As you can see from the ice on the windscreen my fingers were numb and blue but I think it was worth it to finish both this and the spotlamp in one weekend. It may not swivel or be as sturdy as a replacement, but its just as good as the black-tape and the mirror looks positively brand-new, so if it lasts me for as long as I have the car then result!

Saturday, 30 October 2010

General Update + Insurance

Dismayingly there's just nothing new in Scoob world lately. Life is being an expensive ride at the moment and the colder weather makes it too daunting to do any serious mechanical work or painting of the underside, which I wanted to do before winter really. The car is also running brilliantly at the moment so there's nothing thats screaming out to be done. I have managed to sort out a few small, but niggly, faults though and re-insured the car without paying the astronomical amount Elephant wanted for my renewal...

INSURANCE:
I'd already paid for a year on my Beemer at just shy of £400 a few months before the Scooby arrived, so Elephant.co.uk agreed to change my policy over to the Subaru for the same amount again, making the premium total £804. When I received my renewal quote this year though they wanted £1145, nearly another 4 ton more again! I rang them saying I'd found a cheaper quote as I have done before and asked them to get the price down a bit, but they were having none of it this time and could only get it down to £999. I've been with Elephant for 5 years and I like the yellow envelopes you know, but they didn't even seem bothered about keeping my custom so I hit up CompareTheMarket.com again and got a very nice quote of £714 from a new upstart company called 1st Central, which, for fully-comp, with a 27 yr-old driver on a Group 17 car, is very, very good. The customer reviews for 1st Central are a mixed bag - they're not very nice if you crash and it's your fault apparently, especially if you were drunk [duhhh!] - but I thought for that saving it couldn't hurt to try them so lets see how we get on!

BOOT-LEAK:
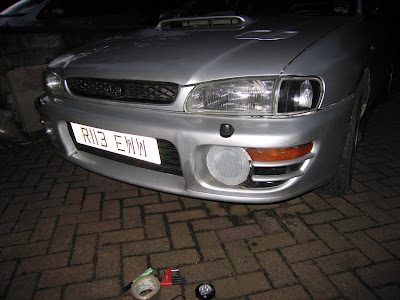
During the incredible bout of wet-weather we had earlier in the month I noticed a damp patch of carpet in the boot-install. I took out the spare-wheel to find a small paddling-pool in the wheel-well. At first we thought it was coming through the boot-lid seal so I began taping sections up to track the leak with no success. After a couple of scans round the forums though I discovered its a common problem with after-market lights, like my Morette LED ones, where they haven't been bolted in tight enough. I'd only checked that the bolts were finger-tight before and when I got a spanner on them I found that they were all pitifully loose and took some turns to get them graunched. I should have clocked onto this much earlier as its becoming clear that the lad who bolted all these parts on before my time was a bit of an animal, with his roof-scoop held on with bathroom sealant and whatnot. Anyway, the wet weather has now returned, but I'm glad to say the leak hasn't and the spare-wheel well is now dry as a bone. Piece of cake!

LOOSE FRONT SIDE-LIGHT CLUSTER:
I replaced the n/s bulb and snapped the plastic-bracket that holds the top of the corner-cluster in place while screwing it in. Ever since then the cluster has wobbled about and often needs pushing back into place. There isn't much to stick tape on to so I've just left it for months, but with nothing better to do on the car I've painstakingly drilled a hole through the back of light-lens itself to provide somewhere to get a cable-tie through to hold it in and its now as sturdy as the other bolted side - you'd never know.


Wednesday, 6 October 2010

Update + BMW M1 'Art Car' Birthday Cake!!

Where has the year gone?! It's rolled round to October already, but at least that means it's my birthday!!

I've finally got a whole two weeks off work, but I've been on holiday in the Scilly Isles for a bit [where there are no Scoobys sadly] and too busy partying to focus much on the car. I have found time to iron out a few small problems that have been doing my head in, like the faulty subs, and neatened up some of the detailing [which I'll cover soon], but I still haven't motivated myself to finish off my carbon wind-diffuser and anything else exciting will mean spending money - and that ugly old thing called insurance is about to rear it's head in a couple of weeks so I'll have to get saving hard again and see what I can achieve before Xmas hits...

For now enjoy this birthday cake that my good friend Chidge made for me. OK, so it's not shaped like a WRX, but it is a rather spectacular rendition of the awesome BMW M1 supercar from the late 70's. The more astute among you will notice that its not just any M1, but is in fact the famous 'Art Car', with the paint-job done by Andy Warhol himself for one of his exhibitions [http://www.bmwdrives.com/artcars/bmw-artcars-warhol.php]. A brilliant car-geek-cake and a very thoughtful birthday gift!!


Can't even tell which is which!!

Monday, 27 September 2010

Painting the PAS-Fluid Cooler + stuff

While I had the radiator out I noticed that the cooler for the power-steering fluid was a bit rusty. This is basically a pipe that runs along the front of the radiator, catching the incoming air and cooling the fluid inside, but its obviously caught its fair share of salty crud over the years too.

The pipe is still sound and the cooler still works of course, but I thought it best to give it some fresh protection while I had the chance. I scraped off all the surface rust, gave it a good rub down with emery-cloth and wiped it off with a damp cloth. I then gave it a good, thick coat of black Hammerite. Shame about the hammered finish, I'm sure I had some black Smootherite lying round, but its high-heat resistant none the less and looks a damn sight better.


While I was at it I thought I'd spruce up the battery tie-down as well and finished it off with two nice, shiny new nuts. Every little helps!

Tuesday, 14 September 2010

Fake Spotlight Update

I thought putting aluminium-tape over the back of the fake lens would make it look more realistic, but I feel it has done the opposite.


I guess its better than the gaping hole.

Sunday, 12 September 2010

Fake Spotlight.. er... Conversion!

People at work have begun to tell me that I have a hole that needs filling... I need to buy a new spotlight for the front bumper! Funds are still a bit tight after summer hols and I'm busy saving for some fancy new brakes so form has follow function in the money department I'm afraid and I can't justify spending up to £80 to sort the light out yet.

I have looked on eBay for some cheap 2nd hand replacements, but it's not just the lamp itself I need, its also the mounting brackets, the bolts etc. One of the bolts has also snapped and is stuck in the hole so that will need drilling out and re-threading too. Long!

But to try and appease the car's fans at work I have instead decided to knock up a fake spotlamp to fill the gap temporarily using, you guessed it, bits and bobs exclusively from the skip at work!

PROCESS:

I started by cutting a spotlamp sized disc out of a piece of clear-plastic insulation-board. This turned out to be the key element to the design as I noticed that the lines down the board mimic the diffuser-lines in the actual light lens. I then cut 1 inch off the end of a wide plastic drainpipe and glued it to the centre of the board to keep the fake light-lens proud of the backplate to match the depth of the real one. To hold the fake lamp onto the backplate I was going to need a fake bracket, so I cut a rough shape out of ABS-plastic [from the mould I used for my carbon wind-diffuser] that was wide enough at the bottom to meet the two screwholes and fixed the fake lamp to it with ally-tape.


Finally I fixed the fake lamp into place, using the original screw holes, with two allen-head alloy bolts and a bit of ally-tape at the top to stop it wobbling.

Saturday, 14 August 2010

Custom Alloy Footwell Plates!

I got hold of a nice big sheet of checker-plate aluminium so I'm fabbing up a few nice little touches for the car. I've already made a few under-bonnet styling pieces, but with the lions share of the plate I've started making some rally-style alloy footplates for the driver and passenger.

Its a great racing-car look [no chrome-plastic imitations here] and really suits the Impreza interior. Its a lot harder wearing and easier to clean than the mats, but the downside is its a bit slippy when its wet, as I've discovered with the recent bout of gloomy weather. Checker-plate is pretty cheap to buy, but these footrests aren't cheap items - eBay has some budget pieces starting from about £20 per side, but if you want a brand, Demon Tweeks have a Sparco set @ £91 for the passenger footrest and £34 for the tiny driver's clutch-rest!

Making them was a doddle. The whole driver's side footwell had to be covered, but I didn't have enough plate for both so I decided to give the passenger a large footrest and just cover the bottom wall of the well. I took a few measurements of the footwells, cut the plate to fit and rounded the edges off with a file for a neat finish. For the driver's side I bent the thin end of the plate up about 45 to match the floorpan and cut a gap out to fit round the plastic-stopper under the go-pedal in case I stifle the throttle. [restrictor-plate? :)] Well my measurements we're a bit off, but without scrutinising the fit doesn't look too bad at all. A boss bit of rally-bling for the cockpit - not bad for a free off cut of alluminium!

Saturday, 31 July 2010

Braided Hose - Engine Dressing

I noticed a metal cooling-pipe at the bottom of the radiator was corroded quite badly and although it is still working fine and will last a while, the whole outside and both collars are well rusted and it looks near impossible to replace, so I thought it might as well be better protected from all the grit, salt and crap coming up through the bumper-grille.

I figured that rather than just painting it, I may as well do a bit of engine dressing while I'm at it so I cut out a piece of stainless-steel braided hose-covering to give the engine a bit more shine and made two collars to fix it to the pipe with ally-tape.

First, I pushed away the flaking surface metal and gave the pipe a rub down with emery cloth, not to the bare metal, but enough to remove most of the surface rust. I then wiped it with a damp cloth and gave the pipe a good, thick coat of Finnigan's No.1 Rust Beater. I wrapped the braided hose-cover around the pipe and looped some aluminium-tape round each end to hold it in place. The stainless-steel cover fits like a glove and should repel most of the grime, hopefully giving the pipe a much longer lifetime.

Saturday, 10 July 2010

Snapped My Only Key!

I bent the key a bit too hard while pulling it out of the ignition and snapped the tip off it. It was bent already and waiting for an opportunity to go and my heart sank as the tip snapped off inside the ignition, the worst possible place. The gods must have been listening to me right then though, because the metal dust-flap clicked shut a moment later and ejected the key-tip like a CD - fucking lucky!!

It turns out the keys are coded [with a little chip inside the plastic that sends a signal to the immobilizer] so I couldn't just have a blank one made up that Saturday afternoon. Instead I had to leave the car stationary and unlocked until Monday when SafeSmart in Birkenhead opened again.

It cost £30 to have the key made up, but if I had a spare in the first place I wouldn't have had any trouble so I decided to future-proof myself by having a second one done to boot. Still not bad @ £60 [i'd have paid double that to get up and running again] and I have a spare - great, as I ran my BMW for 3 years with only one key and worried my arse off.

Saturday, 26 June 2010

Cost Analysis: What's the damage so far?!

OK, so you're probably thinking I've spent quite a lot on this chariot in 4 short months... so heres a cost breakdown of every little thing I've bought so far, in a delightful table format.

Sunday, 20 June 2010

MOT Pass!!

By the time I got back to Seaview motors it was a couple of days too late to get the re-test for free, so I had to fork out another £40 quid, but he very kindly agreed to only do the partial test and check only what the car had failed on anyway. The current MOT still didn't expire for another 6 days, but it turns out I don't lose any of it as this latest certificate is valid from the day of the test, but runs until a year from the current end date [16th June 10 - 22nd June 11] - very nice.

First up was the emissions, with the car recording less than half the original CO2 figures just from the addition of a sports-cat, [although I'm sure the oil/filter change played it's part too]. The guy also reckoned the exhaust had dropped in volume sufficiently, so that was £235 well spent and this cat doesn't kill power so it can stay on.

We got the Scoob up on the ramps and I talked him through the mechanical work, then I jumped in and we did a quick check off all the lights, all things A ok. He did mention that the headlight beam had been lifted just enough, although both were still out of line and should be checked in future, but he didn't even prescribe any advisory notices, so excellent.

If I'd bought the standard shocks instead of the TEIN coilover setup then I would have got the car through for about £400 [or even <£300 if I found a used OEM exhaust]. As it stands I've spent about £900, but hey ho, progress is progress! The standard £115 shocks would have got me through the test, but compressing the old springs back on would have been more involved and the front shocks might need doing soon anyway. I also planned to lower the car at a later date, so thats out of the way too. Besides, doing all the work myself has saved me one hell of a packet and I have the great feeling that no ruthless mechanic has rattled the parts on :)

The true positive outcome of this MOT is that the car is rid of those dodgy discrepancies. It's obviously been pushed through some bent MOTs in the past, with no fog-lights or catalytic-converter, so it's good to know I've brought the car back into check for next year, or the next owner. Time to get back to the bodywork and buy a new front spotlight!


Sunday, 30 May 2010

Engine Cleaning + Dressing - Part I


I've wanted to bling up the engine bay since the day I brought the car home and finally got prompted to this afternoon as I fixed the under-cladding on the bonnet. It was now hanging by a thread and I don't want to chuck it so decided to stick it back up with some aluminum tape. This is great stuff that can be moulded to the underside of the bonnet and its heat-resistant so it won't come loose sat next to the engine.
I started by cleaning the dirt and grease away from a small patch for the tape to stick to, but soon got carried away and ended up polishing the entire underside of the bonnet. I wiped the whole area down with a damp towel, getting rid of the surface dirt but leaving large oily swirls, so I used a mixture of Carb Cleaner and WD40 to cut the grease and get it shiny. Its now a million miles from the tatty mess it was this morning... though it'll shitty up again before you can blink!

The aluminum-tape also served another useful purpose in properly fixing the grille in place - I ran a strip of it along the back of the grille holding it to the slam panel.
The actual reason I chose this rather than screwing through the broken clips is because I've seen a 'Cooling Panel' from GReddy that bridges this same gap behind the grille.
It's made of carbon-fibre and will set you back £145 from Flat4Online.co.uk! [here if you don't believe me] In their words this "increases the amount of air going through the radiator leading to cooler engine temperatures". I'd argue that mine is even better at doing that and cost sweet FA! [tape filched from work of course] The shiny tape also looks cool so while I was at it I smothered the flaking V-belt cover too! [eat your heart out SpecR XD]

Anyway, what good is all this on a grubby engine? I now began the laborious task of cleaning the mechanical stuff [deeper than I have before] and am impressed with the results!


I first removed all the dirt filler-caps and gave them to my dad, who very kindly bathed them in white-spirit and painstakingly brushed the grease from the detailing - they're now reflecting the flash!
I then used more turps to clean the crud off every pipe, hose, wire and lead, as well as the cam-cover, radiator, intercooler, everything... I then rubbed tyre-dressing into all of the black rubber-hoses to get them looking a bit fresher.

As a finishing touch I took the dump-valve off for a polish, but most importantly to turn it round so the Bailey logo is facing out!
Very surprising that the Demon Tweeks mechanic would fit it like that - unprofessional I think, because any person shallow enough to buy a loud, hissing dump-valve would want to see the logo!


ScoobyLab + Propjam 2010/11