<-CLICK HERE FOR SCOOBY TECH. POSTS ONLY! CLICK HERE FOR GRAN TURISMO POSTS ONLY!->
1998 Impreza Turbo Project Car + Expanding WRX Knowledge Base!
Showing posts with label ELECTRICAL. Show all posts

Monday, 3 January 2011

New Halogen Spotlamp Bulb - wrong type.

Well, happy new year everyone and as I'm so desperate to get back working on the car I've kicked off 2001 by buying another high-power halogen bulb to make my old O/S spotlamp match the one I bought recently. Problem is I made a hasty choice and bought the wrong kind. Even after describing the multi-coloured type to the guy in Halfords and re-checking the colour of the bulb itself it still turned out to just be a white glow, with a little bit of blue in the middle and looks more like the one it replaced. £8.99 in the gutter. Ah well, I guess I'll have to keep looking, or just change the coloured one for the original white one I took out today.


FITTING:

Changing the fog/spotlamp bulbs only takes a minute, but its more fiddly than I expected so heres the process.

1. Remove the 3 bolts holding the spotlamp in place using a 10mm wrench.

2. Unclip the plug on the spotlamp wire and slide it free of the wiring-harness in the bumper.

3. Turn the grey seal-plug anti-clockwise until it can be lifted out of the seal. Be careful not to pull too hard on the wiring.

4. Slide the earth-wire, with the light-blue rubber-sheath, up off its mount on the spotlamp chassis.

5. Slide the end of the live wire, coming off the base of the bulb, out of its socket in the seal-plug. The socket sits in a mount and can be lifted out to make it easier.

6. Push down the metal-wire clip behind the bulb at the side nearest the gray-plastic adjustment-bracket and move the wire-clip out of its mount and rotate it out of the way.

7. Replace the bulb with the new one and reverse the process.

Sunday, 2 January 2011

Relocating the Stock-Aerial Part 1

I know Scooby's aren't designed with aesthetic perfection in mind, but its a shame they follow the utilitarian Japanese convention of bolting a tacky plastic thing on afterwards with an 80's pull-out style aerial in, usually on the driver's A-pillar. Even the 60-reg Toyota Hilux coming in at work, which are pricey trucks, still have these things and, while I'm sure they function superbly, they don't half look crap.

I've been planning to re-locate the aerial onto the roof of the Scoob for a while now and change it from a tacky telescopic metal one to a BMW-style 'shark-fin', but you could fit a rally-style mast-aerial, a bee-sting or a GPS-box lookalike in the same way. Its not a difficult job at all, but a brave enough one for me to struggle to get round to it. Doesn't look like it'll be any time soon, with all the other jobs mounting up [
power-steering is gonna need looking at first I think], but I reckon its a sound idea so I'll write it up anyway.

Removing the Stock Aerial:

Unclip and remove the plastic cover on the driver's A-pillar inside the car and cut the wires going to the aerial-mount.

Remove the two screws holding the aerial-mount with a flat-head screwdriver and prize the plastic-mount away from the a-pillar.

Bridge the holes in the a-pillar with metal-filler, or just stick about 5 layers of black-tape over the back of them, then fill the outer layer with P38 body-filler. Its only a tiny area so shouldn't be hard to sand, prime and paint-match.

Installing the New Aerial:

Inside the car, unclip and pull down the roof-lining. I'm still unclear on how to do this so, for now, refer to the Body section of the workshop manual here - http://www.scoobylab.co.cc/2010/12/manuals.html.

Find a suitable spot and drill a hole wide enough for the new-aerial's mounting-stud. Drill from the outside in and it's easy to dent the roof so drill slowly, use plenty of oil on the bit and it might be worth starting with a small pilot-hole to make sure the location is accurate.

Place the mounting-stud of the new-aerial through the hole and stick the base down onto the roof. Tighten the nut onto the mounting-stud inside the car.

Extend the cut-off wires at the a-pillar, if necessary, across the inside of the roof to meet the cable on the new-aerial and tape it into place. It's likely the new unit will have a male FM-aerial connector on it [same as the one in the dash that plugs in to the head-unit], so you could cut it off and hard-wire it, but for a nicer job I'd recommend getting a female FM-aerial socket from Halford's for a couple of quid and crimping it to the a-pillar wire. That way the aerial can be un-plugged easily if some idiot decides to nick your new bee-sting and you have to a quick replacement.

Clip the roof-lining back up into place and replace the plastic-cover to the inside of the a-pillar.

Saturday, 27 November 2010

New Spot-Lamp Sorted!!

Wow, the weather really has turned bitterly cold this week and spray-work is out of the question. I think that to get the lacquer on before xmas now will need somewhere indoors to do it, but I did find a real spot-light this week to replace the fake one so, even though my fingers were numb and purple I just had to get it on. After all, we might have fog again tomorrow...

A while ago I got hold of a replacement front-bumper from a mint import car and luckily it holds the bracket I needed for my missing spot-lamp, which made finding the new one much easier. I will be replacing the whole damage-repaired bumper eventually, but the new one is black so I'll have to get it painted first, its a bit too big a spray job for me I reckon.

The spot-lights haven't been cheap on eBay lately, with a few on for £40+ and loads of pairs starting at £70. The lenses have Subaru etched along the bottom and the back of the lamp is angled, so you can't switch sides and have to rely on finding the one you need. I spotted a near-side one for £30 delivered from smr-subaru and thought what the hell. It took a week to arrive, but its in great condition [much better than my current one] and has a blue/rainbow type halogen bulb in it, which is nice, although I'll have to buy a matching one for the other side!


FITTING:

All 3 of the bolt-holes in the old bracket had broken off studs in them so the whole thing had to be replaced, but luckily the bracket just slides down off hooks and can be lifted out without removing the bumper. It slides out between the gap in the bumper corner so the under-tray doesn't even need to come off. The old wiring socket for the spotty has been hanging loose next to the wheel-well, so I gave it a good clean out with brake-cleaner and electrical solvent before plugging in and testing. The new bracket is off an import too and as you can see from the pic its in great condition with perfect threads so I bolted the new lamp in place with 3 more of those trusty alloy allen-bolts from the skip at work. The top-right bolt also holds the corner-indicator in place again, which is great as its been held on with a giant ball of ally-tape sincebefore I bought the car. I'm chuffed to bits to have this boxed off at last, the car is starting to look a lot less ratty - just gotta fix that broken wing-mirror and the body is complete!!

Saturday, 6 November 2010

Return of the MAF!! - Sensor Replaced!

It's less than a week since the car died and I've managed to get her up and running again, thanks mainly to a lot of help from the ScoobyNet massive. I really thought it was curtains this time - the car just seemed so poorly on Tuesday, coughing, spluttering and idling so crazily - all the signs of a generally broken engine and I would have never have known where to start diagnosing it without all the help and advice from the forum and its free - diagnostics are renowned for running up huge bills at garages, so the Scooby community really is worth its weight in gold.

With the mechanics at work all pointing to a broken head-gasket, I nearly started the horrible job of ripping the engine apart, but now I've discovered the black-socket trick for reading your own fault-codes, [which I will have to cover properly in its own post soon - I've never seen anything so trick!] I know I won't be needing dodgy opinions in the future. Much better to get info from people who know their Scoobys inside out!

By Friday I'd got in touch with a lad on eBay called BigEd4244 who had a couple of Purple MAFs for sale, and asked me to make him a serious offer. I said £70 and he messaged back to say he'd take £90 and send the unit next-day delivery, so I agreed and sure enough the MAF was waiting for me when I got home on Saturday. Fantastic, helpful service! A new one of these would set me back £289, so mine would have been literally cheap at twice the price.


Fitting it couldn't be easier. It's held in place by one of the bolts that hold the top-hat adaptor for the air-filter, which is fine if you have a cone like me, but getting the bulky, standard air-box off is a bit more involved, so check page 2-7 [W1A1] in the Subaru Workshop manual [download here] if you do have the latter. This process is the same for all Classics after MY97.

PROCESS:

1. Disconnect the battery earth-terminal.

2. Unplug the wiring-socket from the near-side of the MAF-unit by depressing the clip and sliding it out.

3. Remove the air-filter by undoing the jubilee-clip with a screwdriver.

4. Remove the four bolts holding the top-hat adaptor for the filter onto the MAF-unit using a 10mm wrench.

5. Undo the jubilee-clip holding the MAF-unit to the turbo-inlet hose and gently lever the MAF-unit down into the gap below until it breaks free of the rubber-hose.

6. Wipe around the mouth of the rubber-hose and the terminals on the MAF wiring-socket and reverse the previous 5 steps to install the new MAF-unit.

I am now reveling in smooth-running bliss. The engine feels so content through the rev-range now that I can't help wondering if the MAF-sensor has been on its way out for a while, becoming more and more noticeable with the cooler weather. I'm well annoyed that this £90 couldn't have been spent on improving the car elsewhere, but I guess keeping it on the road comes first. Cars eh?

Wednesday, 3 November 2010

MAF Sensor Trouble, Car Dead!

Oh my days, I've had so little to do on the Scoob lately that I have almost willed something to go horribly wrong. And it has. The MAF [Mass Air-Flow] sensor, which sits just behind the air-filter and gauges the amount of air coming in to the engine so it can prepare the right amount of fuel, looks like its thrown its hand in suddenly and for no good reason. Its a notoriously hard to come by part too and the worst bit is my baby is off the road until its fixed. Oh well, I was hoping when I did get working on the car it would be to upgrade it, but hey ho :)

FAULT FINDING:
The car started juddering on Monday morning at about 2500 revs so I let it warm up and it was fine so I put it down to the cold weather, but the judder has continued to get worse. When the turbo was kicking in the engine was going to pieces. Once the car was warm though and I managed to get past the rev barrier, the turbo was running fine.

I asked around on ScoobyNet and everyone suggested the MAF sensor, but to know for sure I'd need to plug-in and read the fault-code. I don't have a diagnostics-setup to hand myself, but I was amazed to find that Subaru have a built-in workaround for the layman. Under the steering-column, behind the dash, are a couple of black wire-connectors. When they're plugged together and the ignition is turned on the Check Engine light will flash a sequence like morse code. The series of long and short flashes corresponds to an error-code - a seriously cool bit of gadgetry that! I got 2 long and 3 short flashes, which is a code 23 and, of course, the MAF-unit. http://www.scoobypedia.co.uk/index.p...odeDefinitions

At the time that sounded great because I was fearing a blown head-gasket again, but its turning out to be a right bugger to get hold of. There are quite a few types of MAF-unit for the varied Imprezas and you have to get the right one. Each model variant has a corresponding coloured label on the MAF and most people were telling me to buy an Orange one so I had to get mine off to see.


Lucky I checked as it turned to be a purple one! I'd found someone with an Orange one to sell me for £70, but it looks like the Purple is a more elusive chap. ImportCarParts do have a few brand new Subaru's own Purple label MAFs in stock, but you pay for the convenience at £289!!

I've made my plight known on ScoobyNet and it seems the purple MAFs are popping up often enough so we'll have to wait and see what comes up because I just can't afford to shell out another 3 ton on repairs this close to Xmas.

*UPDATE!* 6/11/10 - I have obtained a purple-label MAF unit and it seems to have done the trick thank heavens! Info + How-To is in this post - MAF Sensor Fixed! Phew!

Saturday, 16 October 2010

Fixing the Subwoofers

FINALLY! After four months I've discovered what was making my subs work so strangely! This is definitely worth noting as it is likely a very common problem and could stop you needing to replace your subs/amp if you have the same symptoms.

FAULT FINDING:
I took the system out of the boot while fitting the coilovers and when I put them back in they were almost inaudible. Everything appeared to be working so I fiddled with the settings on the head-unit for a few days, but they were so quiet I didn't even notice the fuse had blown at some point. I replaced it, but they kept on blowing after a few days so I checked all the wiring for splits where the metal could be touching the car somewhere. They were all fine.I thought itcould be an earth problem, but if the black cable isn't grounded properly then the amp wouldn't turn on at all. I then checked and re-checked the remote cable from the head-unit to the amp, as this was a horrible problem I had with the system in my Escort, but it all just looked hunky dory. The speakers were moving too, wildly back and forth from one extreme to another, so they were definitely getting a signal.

As for the sound, most of my passengers were convinced I was losing my mind, as the Infinity Kappa's in the doors are pretty bass heavy as is, and kept telling me nothing was wrong. After a couple of busy months though, lugging round a small person's weight of subs and replacing fuses every 5 minutes, I just had to get to the bottom of the quiet running or get rid of the install altogether.

I'd checked and re-checked everything, so the problem had to be inside the components themselves. If a circuit had gone somewhere in the amp then I'd have to buy a new one, but luckily [i guess] the problem was inside the sub box. I guess it must have been stored somewhere damp before I bought it, plus the Scoob's boot and my porch probably weren't much better, because the wiring on the back of the speaker-terminals had started to really corrode in some way. I don't know if you can quite see in the photo, but it's a white powdery crud that covered the brass terminals and was starting to move up the copper cable inside the plastic sheath. I only know of aluminium corroding in this way, never copper, brass or gold-plated bits, so I suppose it might have been some alloy in the solder[?] It was the joins that held the worst of it and when I was checking one wire the crumbly solder broke straight off. Idon't know how the difference between these corroded wires working and breaking was sosudden, because it looks like they've been rotting for a while, but at least it's an easy fix and peace of mind at last!


FIX:
I cut the cables off a good cm past the end of the corrosion, stripped the ends and, instead of soldering them back on, I crimped on some new gold-plated spade-sockets, £3.99 at Halfords, but at least I know this won't happen again. I then took the brass spade-connectors off the terminal, burned the solder off them on the cooker and gave them a good rub with emery, before wiping any trace of the corrosion off everything. I hooked up the new spades and wrapped them in a nice piece of heat-shrink. As soon as I turned the head-unit on the bass was back! YES!

Tuesday, 14 September 2010

Fake Spotlight Update

I thought putting aluminium-tape over the back of the fake lens would make it look more realistic, but I feel it has done the opposite.


I guess its better than the gaping hole.

Sunday, 12 September 2010

Fake Spotlight.. er... Conversion!

People at work have begun to tell me that I have a hole that needs filling... I need to buy a new spotlight for the front bumper! Funds are still a bit tight after summer hols and I'm busy saving for some fancy new brakes so form has follow function in the money department I'm afraid and I can't justify spending up to £80 to sort the light out yet.

I have looked on eBay for some cheap 2nd hand replacements, but it's not just the lamp itself I need, its also the mounting brackets, the bolts etc. One of the bolts has also snapped and is stuck in the hole so that will need drilling out and re-threading too. Long!

But to try and appease the car's fans at work I have instead decided to knock up a fake spotlamp to fill the gap temporarily using, you guessed it, bits and bobs exclusively from the skip at work!

PROCESS:

I started by cutting a spotlamp sized disc out of a piece of clear-plastic insulation-board. This turned out to be the key element to the design as I noticed that the lines down the board mimic the diffuser-lines in the actual light lens. I then cut 1 inch off the end of a wide plastic drainpipe and glued it to the centre of the board to keep the fake light-lens proud of the backplate to match the depth of the real one. To hold the fake lamp onto the backplate I was going to need a fake bracket, so I cut a rough shape out of ABS-plastic [from the mould I used for my carbon wind-diffuser] that was wide enough at the bottom to meet the two screwholes and fixed the fake lamp to it with ally-tape.


Finally I fixed the fake lamp into place, using the original screw holes, with two allen-head alloy bolts and a bit of ally-tape at the top to stop it wobbling.

Sunday, 6 June 2010

MOT Update - 2 weeks to go!

The test looms near and wow there's a lot going on in Scoob world! - I've spent over £1000!!

Got about a fortnight to go now until the current MOT runs out, however I'll have to get the car back into Seaview Motors by next Friday (11 June) to qualify for a partial re-test, where they only check what the car failed on [and any other faults that have arisen this week will be ignored!]

Just over a week and I've sorted all but the few mechanical problems.
Heres the checklist so far :

1. N/S Headlamp Aim - The 98 model Scoob features electronic headlamp-leveling [for when you're towing a caravan] so the beam for my O/S headlamp can be raised with the flick of a switch. The N/S one is off a 94 Scoob though, with no fancy leveling and simply had to be raised the old-school way by shining the lights onto our garage door and adjusting the beam up manually with the ratchet behind the light-lens.

2. Number Plate Lights - Luckily the 'broken' one only needed a new bulb, the socket was just hiding away in the bumper so I replaced both bulbs with 'Heavy-Duty' 12v-5w mini-bulbs @ £3.99 from Halfords. The other socket had worked its way free of its mount so I just screwed it back up with a 10mm long self-tapper. Simples.

3. Foglamp Not Working - This got fiddly! We took the bulb out, which looked blackened so we chucked in a replacement to find this wouldn't work either. After much deliberation over whether the switch or wiring may be broken we reached for the Multimeter... I first downloaded some wiring diagrams for the rear lights and as my dad and I got our heads around them we discovered that the two wires that run to the Subaru fog-lamp were not connected to anything on the new twin-clusters. I chopped the wires from the fog-lamp on the new clusters and fed them directly through the connector and into the two terminals that had previously been blank. Hey presto! Instant fog-lamp! Its a great feeling to know I've finally given the car a fog-lamp it never had before, but weird how she sailed through her last 2 MOTs with these lights on - no mention of the friggin non-existent lamp! Dodgy!

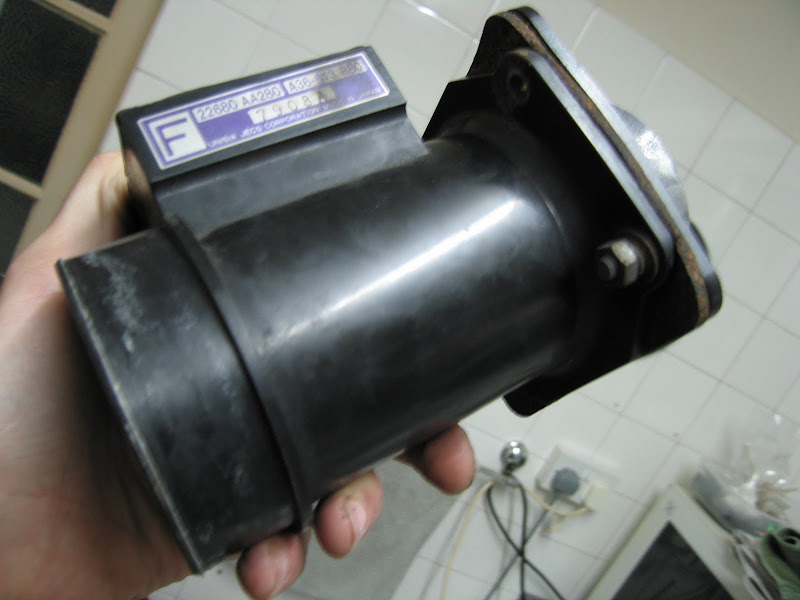
4. ABS Warning Light On - I downloaded a "Diagnosis Checklist" for the ABS warning light - a whole 50 pages by itself!! We grabbed the multi-meter and managed to work through the major components [PCM control-module, power circuit, etc.] with no results. I've deduced it is probably one of the tiny ABS-sensors on the wheels, which are nigh-on impossible to replace, so for now I decided to just take the bulb out of the warning-light in the dash. Had to take the whole dash apart to get the gauge-binnacle out, but all in all the job took less than an hour.

5. O/S Steering Rack Boot Split - Found the part on a great site called JapaneseMotorSpares.co.uk, who have a superb stock of all those niggly, hard-to-find import parts. A pair of the boots cost £12 delivered and arrived the next day, absolute bargain, so I will have to get around to fitting the other one seeing as I have a spare. We got the boot on very easily in about 1 hour - I'll cover it in a post soon as.

6. N/S Rear Shock Absorber Leaking - I went a bit mad here. A pair of OEM [Kayaba Racing] rear shocks was the obvious direct replacement and cheap as chips @ £115 - but I didn't buy those. Instead I plumped for an entire adjustable coilover kit from JDM badboys Tein, which was a bit pricey @ £655, but you get what you pay for - these are the real deal!! Me and dad fitted the rear two on Sunday, but its a complete kit so the front ones will have to go on soon. Watch out for the post!

7. Emissions and Noise Excessive - This was the real problem-child. Quik-Fit, National, even large local stores like Chester Exhausts don't exactly shift many of these standard systems, so the cheapest price quote I could get for a full system, fitted while I sip coffee was £819. Ouch. The next option was to buy the OEM system separately and fit it myself. All I could find new was a real budget model 1st and 2nd cat @ £240 together, but still a rear pipe would be extra.
Scoobynet chums suggested I just shell out for a sports-cat for about £250 and have done with it, which will pass the MOT while hardly decreasing the power or noise. This originally seemed expensive to me, but after the OEM shit I guess not only is it the best value-for-money, but actually the cheapest option too lol. I tracked down a nice Prodrive 100cpi sports-cat that should fit straight onto my Peco centre-section... I hope, and its a bit below the average @ £235 delivered, although it is a used item - off a V4 STi Prodrive to be exact :) Hopefully this will get us through the test - I will have to hope it kills the noise a little bit or I'll have to buy a bung...

The deadline is Friday and the Prodrive cat still hasn't arrived so fingers crossed!

Monday, 26 April 2010

Quick + Dirty Boot Install...

Decided to make a neat but cheap install to hold my heavy subs in place without having to screw through the under-tray. Having already bought the electricals, this tidy install didn't cost me a penny to make...


I got hold of a large sheet of thin plywood being thrown out at work, laid the Subaru boot-mat over the plywood and drew round the mat to make a template. I then cut the shape of the boot-mat out with a jigsaw.

This won't fit into the boot in one piece, so I cut across the wooden floor left to right just before the point where the floor starts to widen out. The back-piece now forms a fixed base for the subs to sit on, where the front-piece can be still be lifted out to access the spare wheel. The subs can only go back a certain amount before the width of the twin-box hits the corners of the rigid section under the parcel shelf, so I measured the optimum depth of the back-piece while still allowing enough room up front to life the spare wheel out. The subs are still proud of the back-piece by about half a cm, but this makes a nice lip for the front-piece to slide under.

I cut a section from the left side of the front-piece about three-quarters of the way along to become a base for the amp to sit on, which is also fixed in place. The entire right side of the front-piece lifts out and I drilled two holes and inserted a blue cord to make a handle to lift it, which was an old lanyard-cord, also scavenged from the skip at work.


I screwed some 2cm x 4cm strips of boxwood along the underside of the back-piece, (which were, along with the screws again filched from the skip at work) and two long strips at the left side that continue forward to the back of the boot for the amp-piece to screw onto. I finally put two strips on the right front-piece, one either side of the spare-wheel well so the different floor heights match up. This meant I could drill holes for all my wiring and hide it away underneath the wooden boot-floor, as shown in the pics below, a really neat touch.


So there you go, reasonable install at nil cost.. and no more sliding sub-box! I have now also got hold of a roll of some very nice light-grey acoustic carpet from, yes you guessed it, the skip at work hehe, so I'l be covering up the cheap plywood look as the summer gets going.
 
ScoobyLab + Propjam 2010/11